Could someone please tell me how this is made I'm braiding and crocheting rugs but I can't for the life of me understand how this design can be made.What hook that's used?
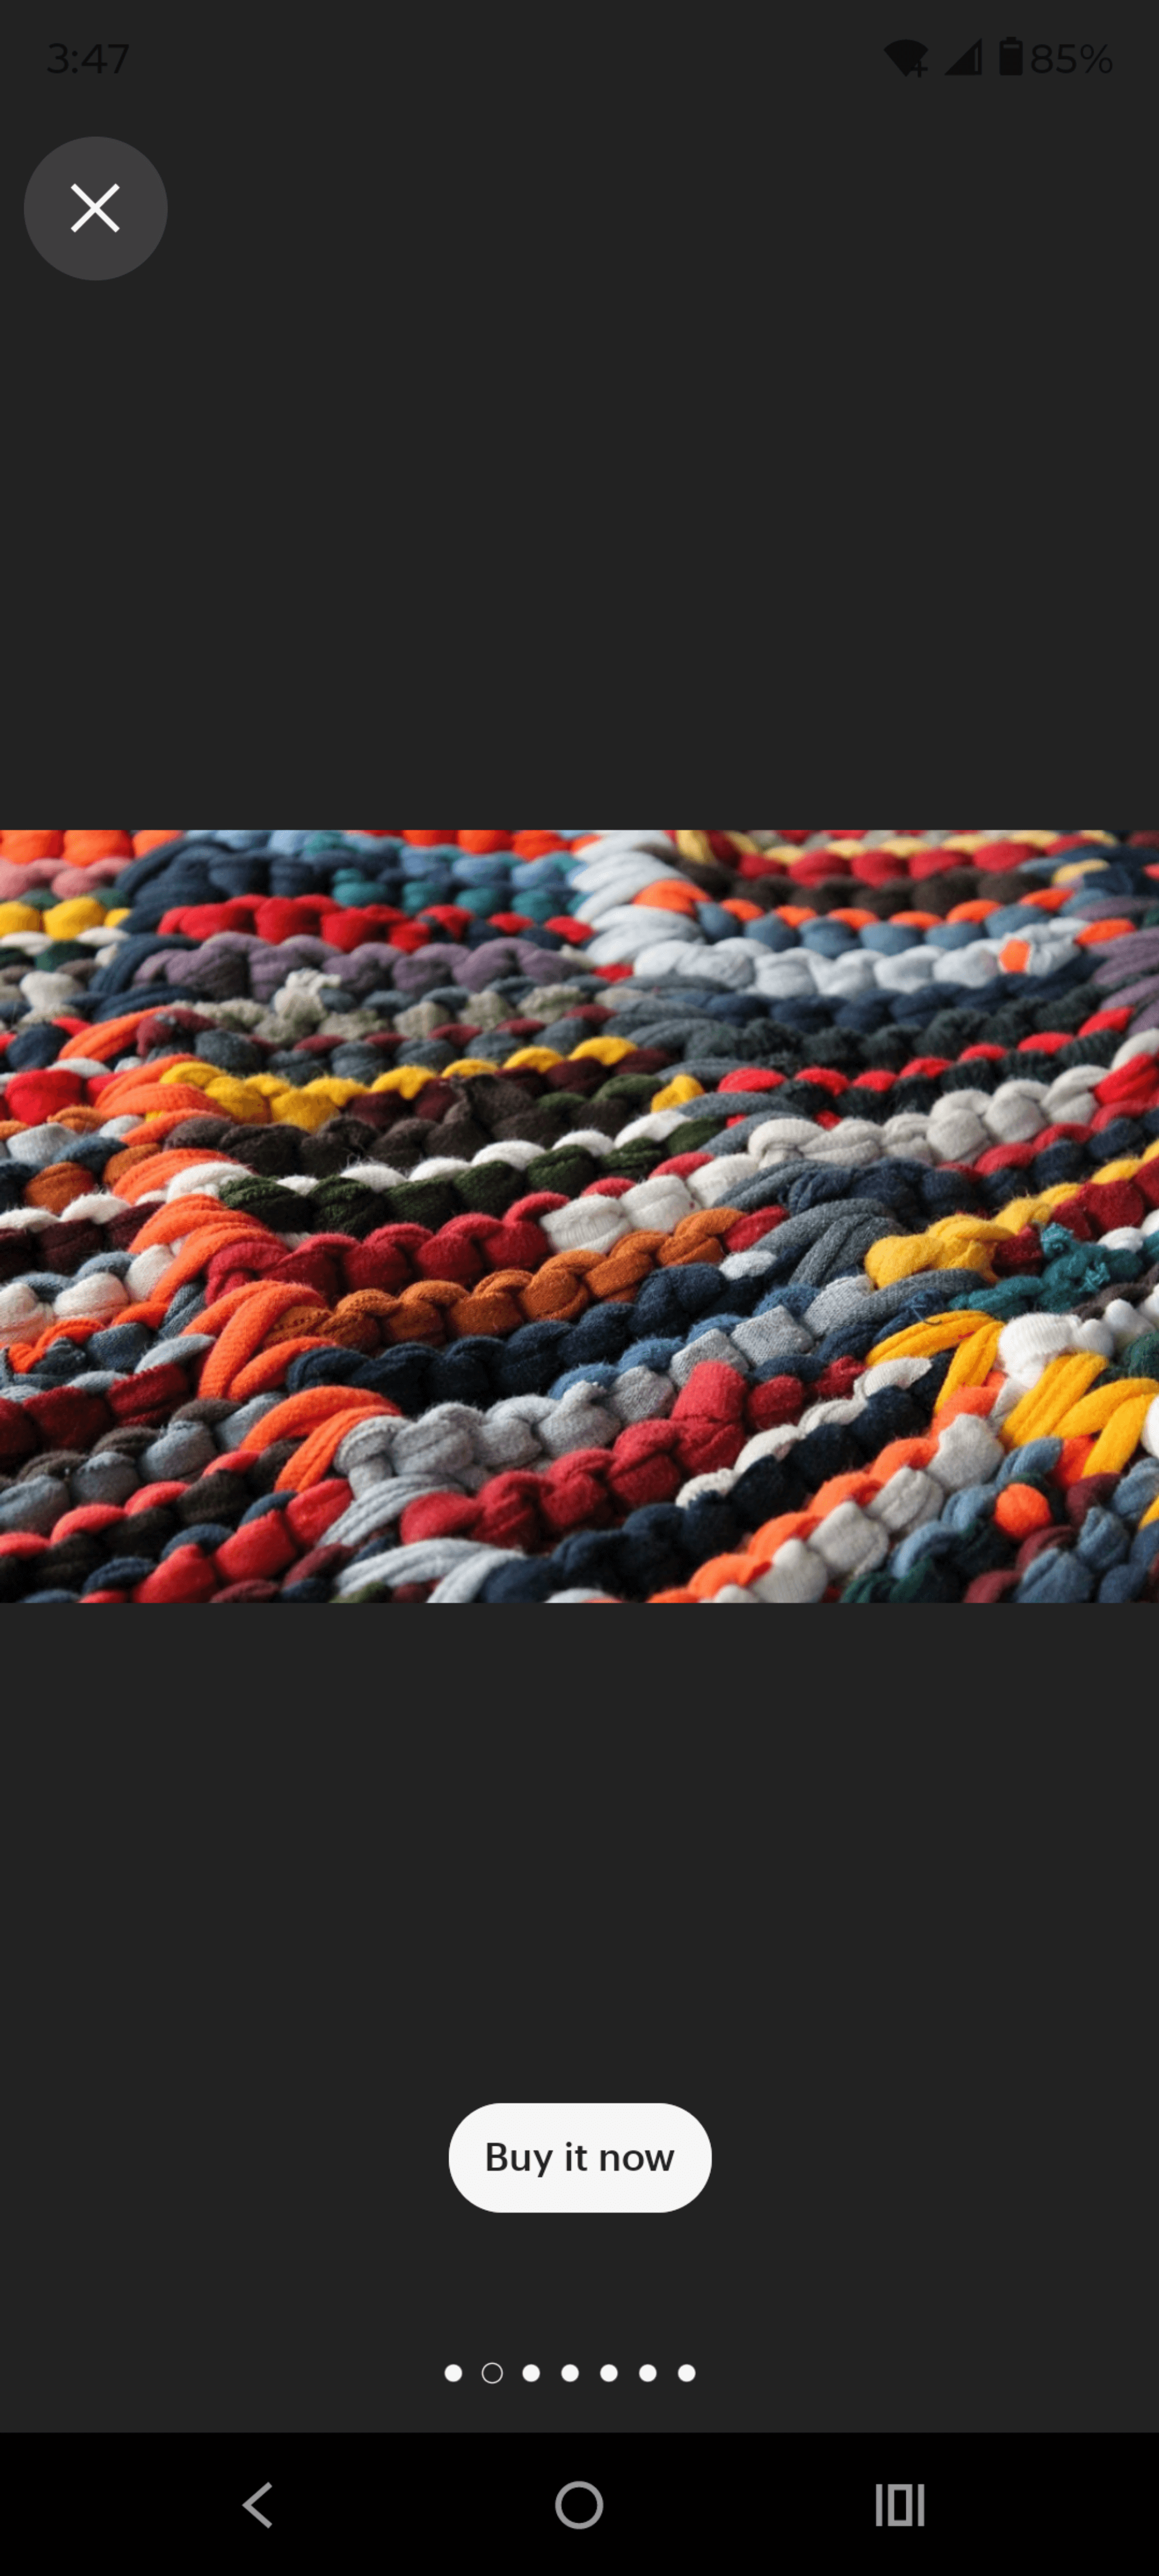
I see this image is from this Round Rag Rug Etsy listing where it states it made out of upcycled T-shirts, so I'm guessing it's hook size roughly between N-Q (9-16mm) though this of course depends on the rags used.
In terms of technique used it's hard to tell, to me it looks most similar to this seamless spiral crochet.
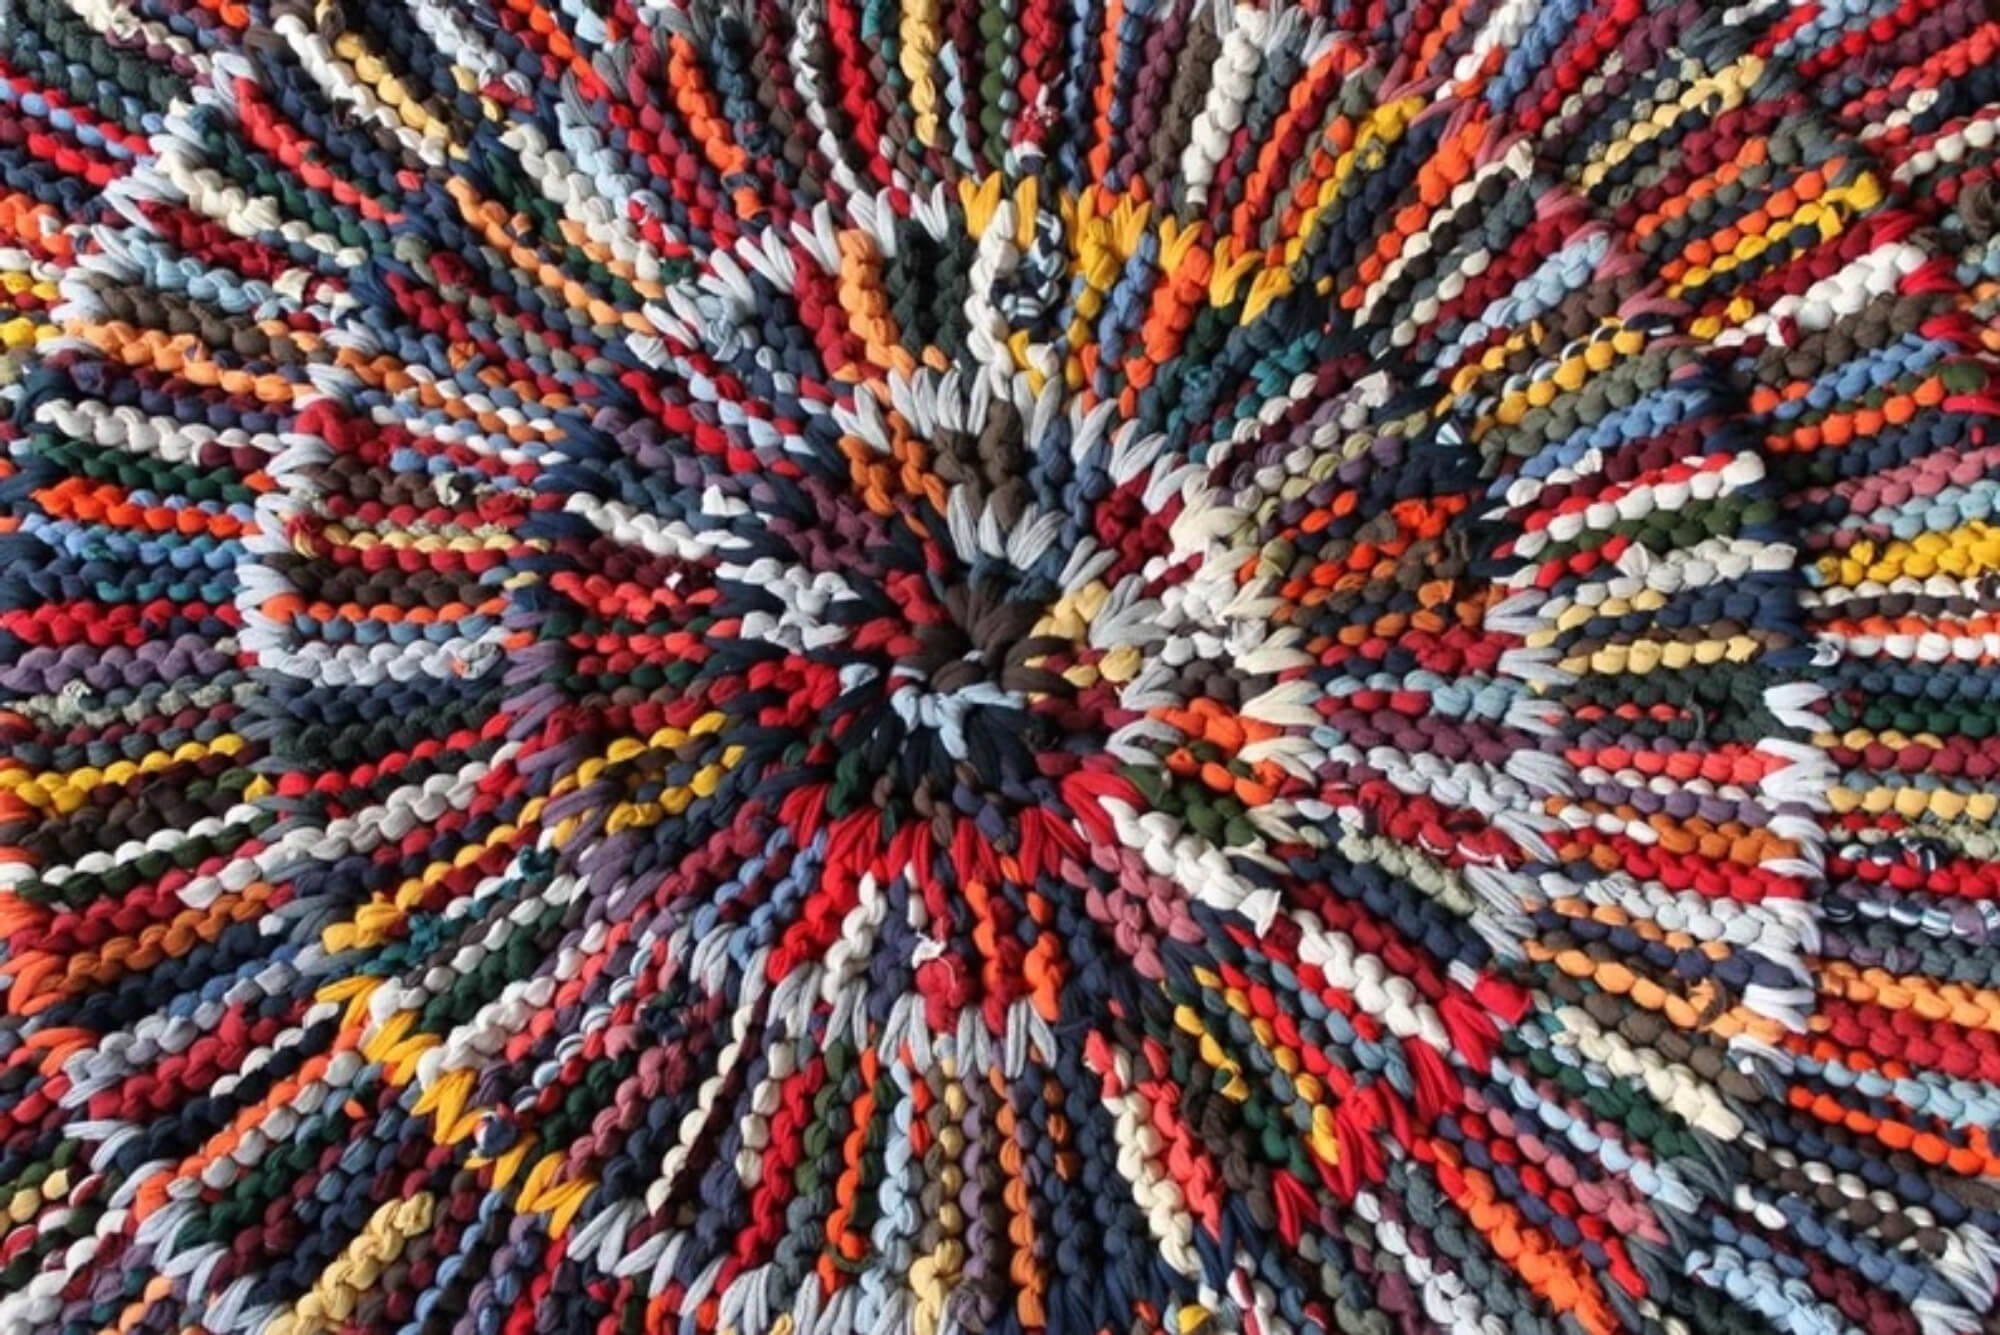
Well to me it appears to be seven stitches. Then there's that v loop and then another one is added and I'm guessing that there's a middle part that all of these are attached to and then sewn together. That's what I was hoping someone would help me with. Do you think it would be put together that way?
I'm thrilled to assist with your rug-making journey! Let's delve into the mesmerizing world of braided and crocheted rugs.
Understanding the Design
For a braided and crocheted rug, the design can often involve creating a series of braided strands that are then stitched or crocheted together. This can give a more dimensional texture compared to typical crocheted rugs.
Crochet Hooks and Materials
Hook Size
The appropriate crochet hook size often depends on the thickness of the material you're using. Thick t-shirt yarn or cloth strips usually require a larger hook, like an N (9mm) or larger. Adjust according to the tightness of the stitch you desire.
Materials
Common materials include fabric strips, t-shirt yarn, or rope. Each provides a unique texture and weight to the finished rug.
Steps to Creating Your Rug
Braid Strands
Begin by cutting strips of your fabric or using t-shirt yarn. Braid these strips into several long strands.
Crochet the Braids
Once your braids are ready, use a crochet hook to stitch them together. This can be done in a spiral pattern, starting from the center, or in rows, depending on your design.
Variations
Adding different colors or textures within the braids or using different crochet stitches to attach the braids can add interest to your rug.
Braid and crochet your way to beautiful creations! I can't wait to see the wonderful rug you create. Happy crafting! 🌟
More Related Questions
Creating home decor with sublimation can be a fun and rewarding way to personalize your space or even create saleable items!
Steps for Sublimation Home Decor
Select Your Blanks
Choose the right sublimation blanks for your project. This could be anything from cushion covers to wall art panels.
Design Your Artwork
Design your artwork using graphic design software. Creative Fabrica Studio offers editable templates and a wide range of graphics and fonts to make this step easier.
Print Your Design
Use a sublimation printer with sublimation ink to print your design onto sublimation paper. Make sure your print settings are optimized for quality.
Heat Press Application
Preheat your heat press machine according to the blank's requirements. Place your sublimation paper face down onto the blank and use the heat press according to the time and temperature settings necessary for your material.
Finishing Touches
After pressing, let the item cool down and remove any protective liners if applicable. Inspect your finished product to ensure the design transfers flawlessly.
Popular Sublimation Home Decor Ideas
Personalized Cushions
Print custom designs or photos on cushion covers for personalized lounge and bedroom decor.
Sublimation Wall Art
Create unique wall art pieces with inspirational quotes or abstract designs using MDF or metal panels.
Customized Coasters
Design chic and durable coasters, perfect for protecting surfaces and adding a decorative touch.
With these tips, unleash your creativity and adorn your home with beautiful, personalized sublimation decor. Get ready for a home full of character and charm! 🏡
What did I do wrong if the outline of my transfer shows and the tape outline also shows? Can I fix it? I had a 100% polyester shirt and used the settings of 395 degrees for 40-60 seconds.
Achieving a smooth transfer on polyester can sometimes be a bit tricky. Let's explore reasons and potential fixes for the issues you're experiencing.
Reasons for Outline Visibility
Pressure Settings
Applying too much or uneven pressure can cause the outline of the transfer and tape to become visible.
Inadequate Temperature or Timing
Excessively high heat or the incorrect duration might affect the appearance, leaving visible marks.
Edge of Transfer Paper
If the transfer paper's edges are not well-trimmed, they can become noticeable after heat pressing.
Residual Adhesives
Tape residue can be left behind on the fabric, especially if the tape is not heat-resistant.
Potential Fixes
Use Heat-Resistant Tape
Ensure you are using a tape specifically designed for heat application to minimize residue and visibility.
Optimize Pressure
Adjust the pressure on your heat press machine to ensure it's neither too tight nor too loose, allowing even heat distribution.
Pre-Trim Your Transfer
Carefully trim the transfer paper close to the design to avoid any unnecessary edges being pressed onto the fabric.
Reheat with Protective Sheet
Try heating the transfer area again with a piece of parchment paper over the design to help diminish visible lines. Ensure you use a lower temperature and shorter time during reapplication.
By addressing these factors, you can achieve a cleaner finish on your polyester shirts. Happy crafting! 🌟