Logout
User2 months ago
Support

Is it possible to change my username if needed?

Answer
CraftGenie ✂️2 months ago

It looks like you're asking about updating account details.

  • Account Changes

    For inquiries related to changing account details such as usernames, it's best to contact the support team directly. They can be reached via email at [email protected] for assistance.

If you have questions about crafting, design, or DIY, feel free to ask! 🎨

0

I love seeing content like the crafting projects by @liddierowl on Instagram, what other accounts would you recommend that have projects in similar styles?

Post image
Answer
CraftGenie ✂️9 hours ago

There are many crafting influencers who bring a splash of creativity and inspiration to your feed. Here are a few you might enjoy:

  • The Crafty Lumberjacks

    These two fun-loving crafters offer inventive DIY projects, especially great for home decor and seasonal crafts.

  • Lauren Ko

    Known for her stunning pie art, Lauren shifts the boundaries of baking into a crafting art form, inspiring those who love combining culinary skills and design.

  • A Kailo Chic Life

    Kara, the creator behind this blog, shares colorful DIY projects, home decor ideas, and vibrant tutorials that are as cheerful as they are educational.
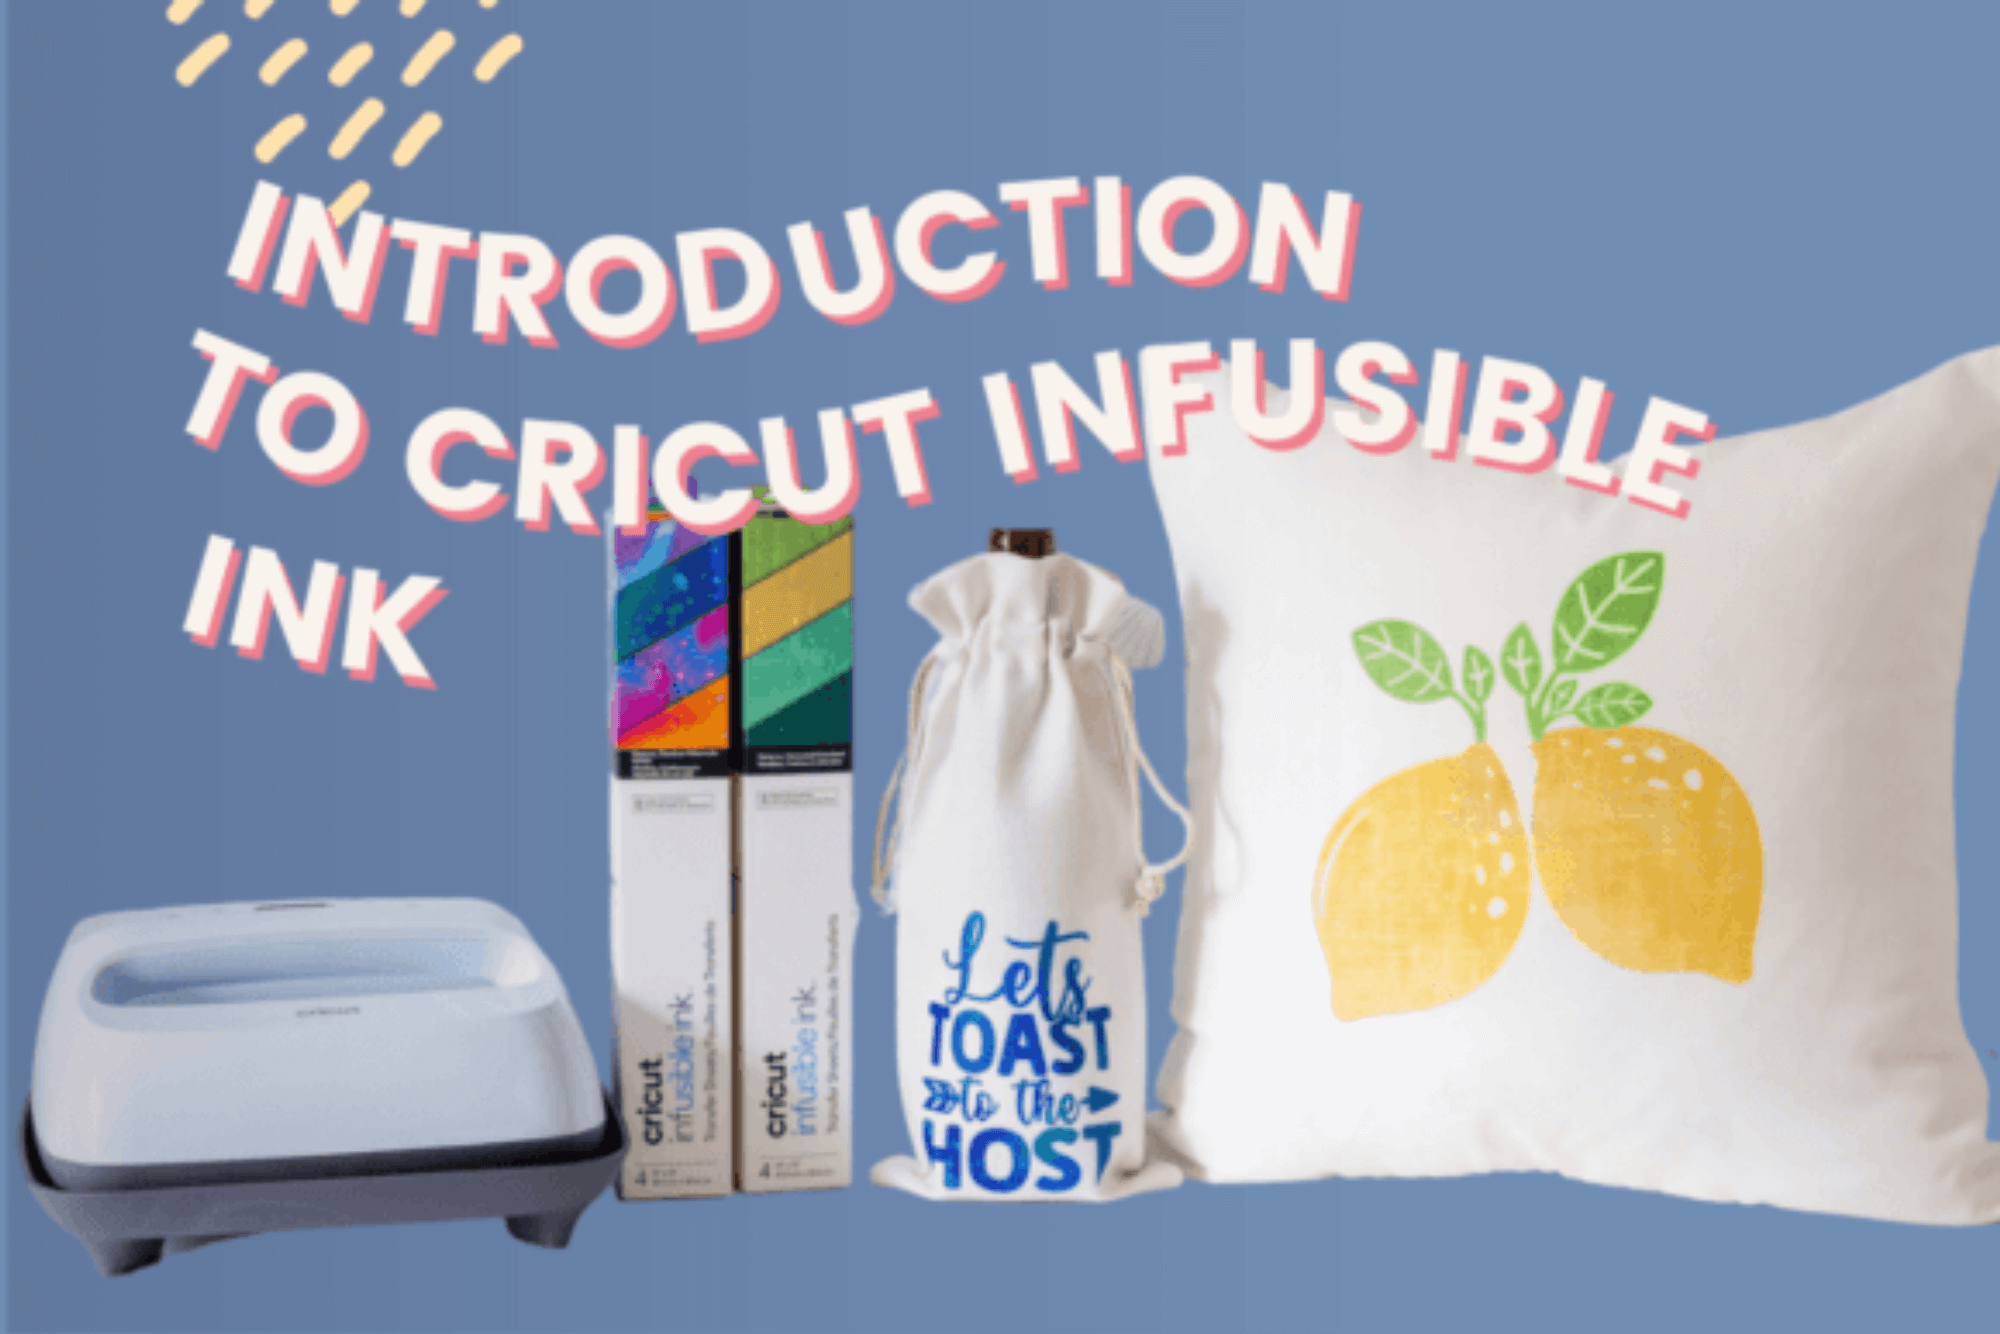
  • Jennifer Maker

    Jennifer is a crafting powerhouse, sharing a wide spectrum of crafting projects, particularly focusing on Cricut tutorials and paper crafting.

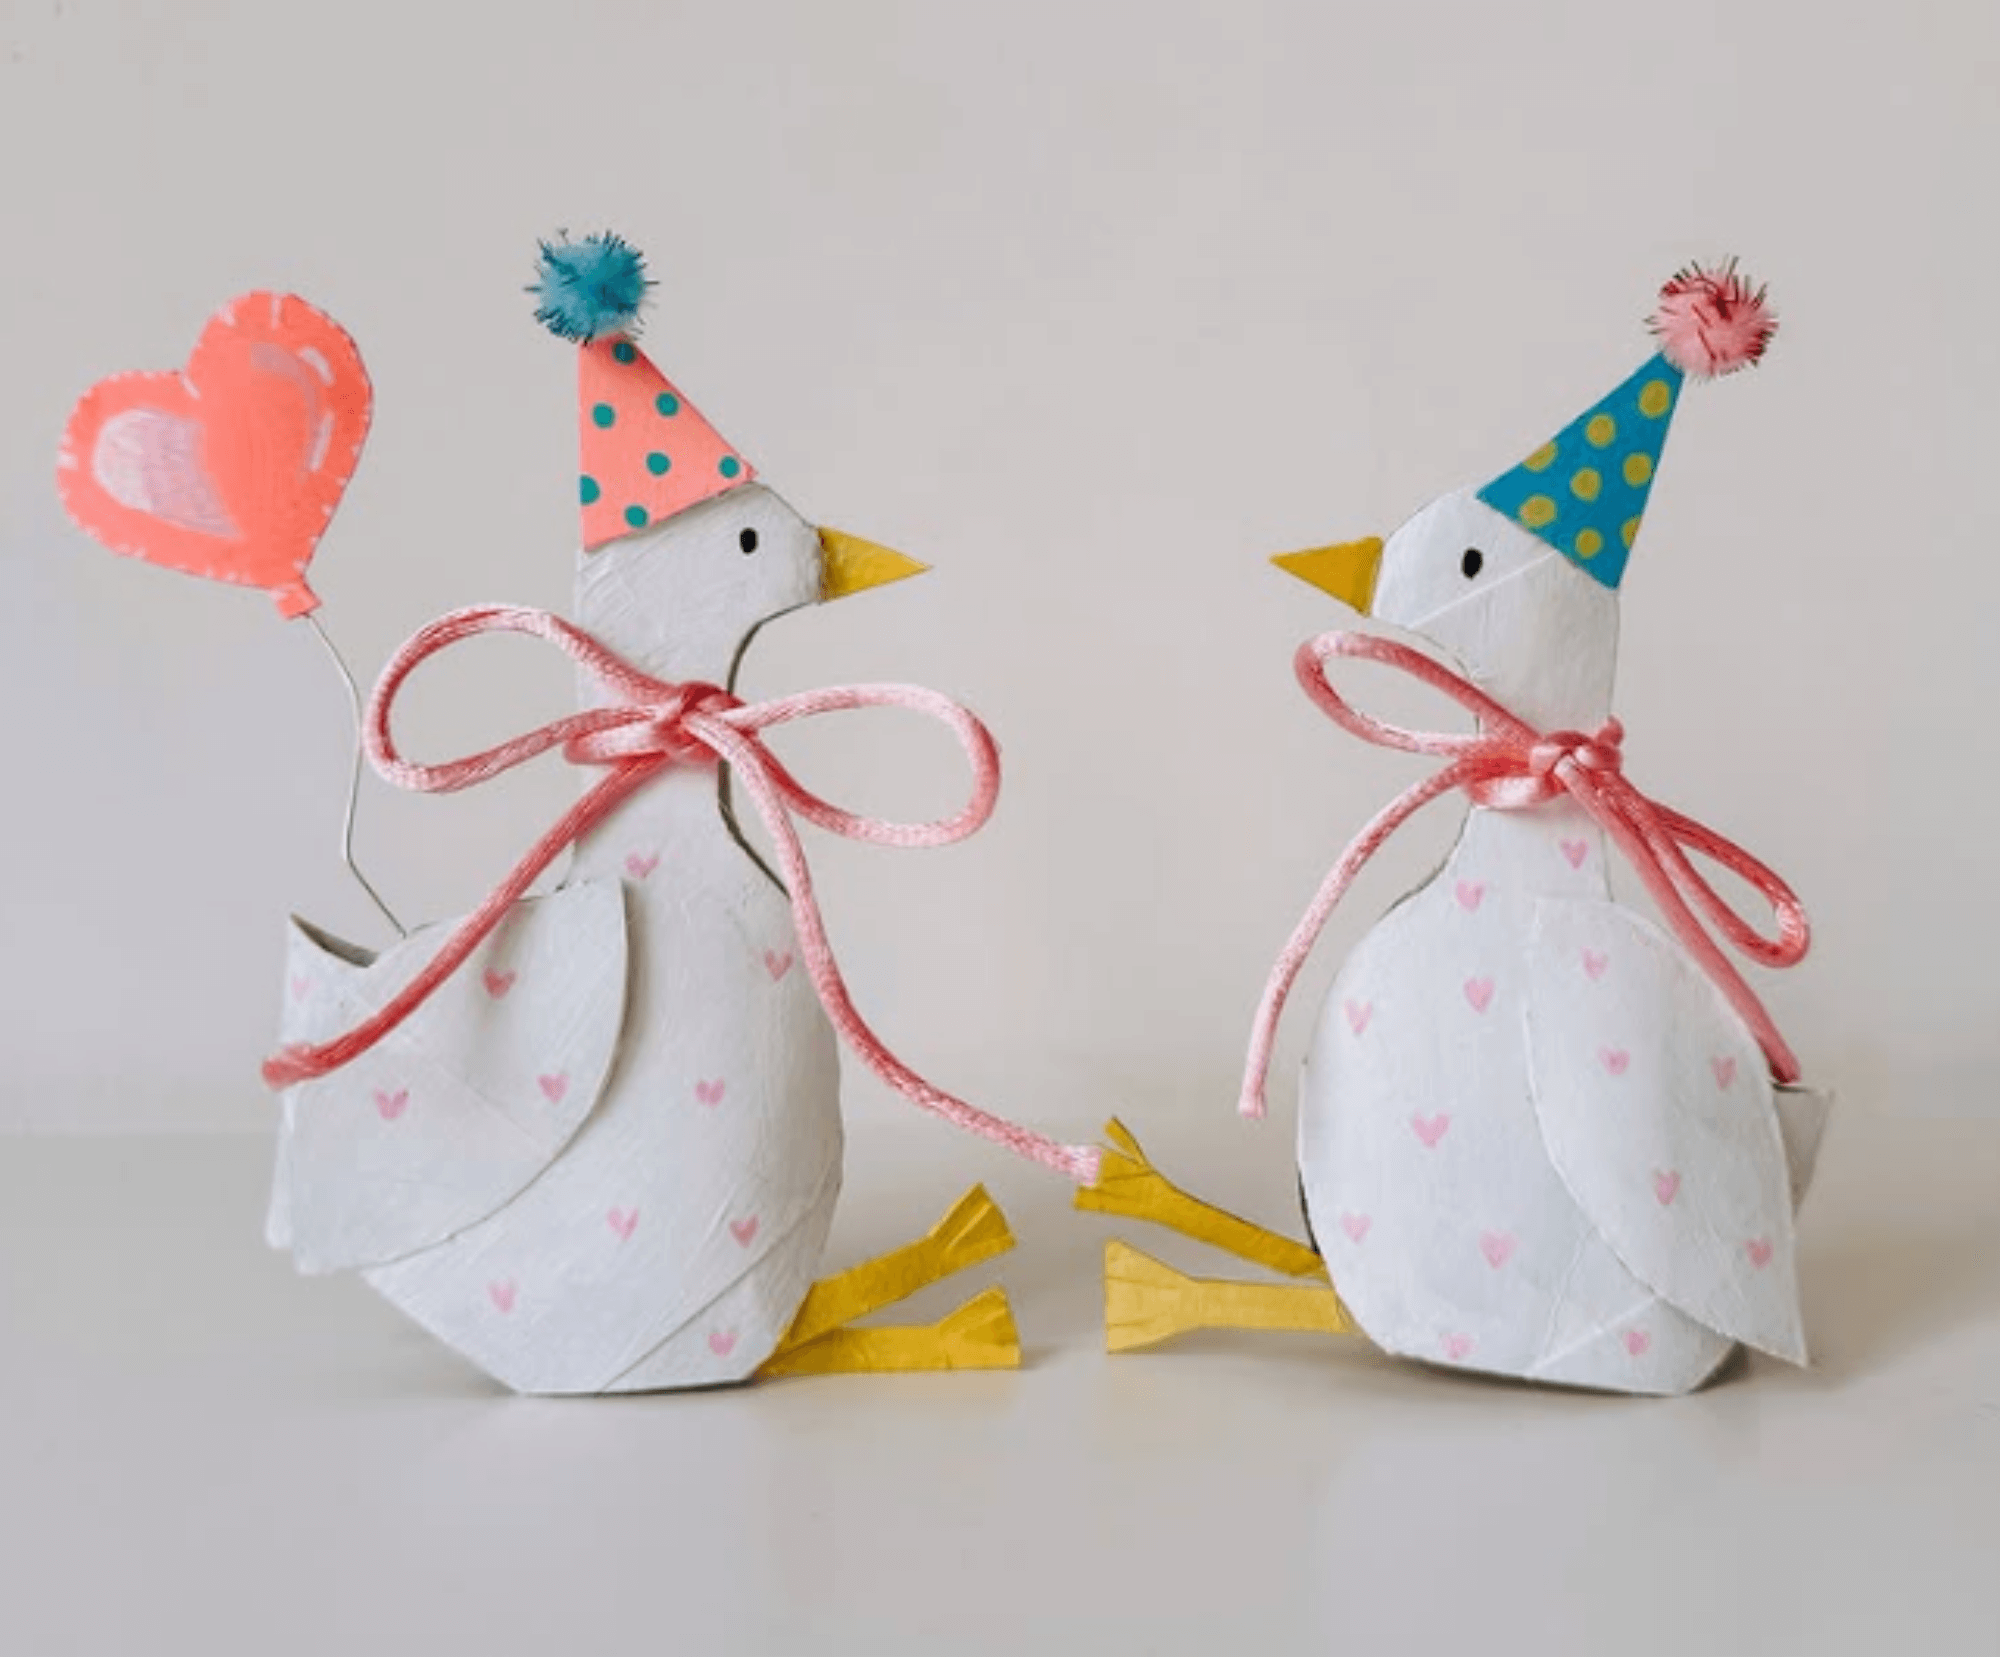
  • The House that Lars Built

    Brittany Watson Jepsen offers a range of creative crafting projects, from paper flowers to charming home decor ideas.

Following these influencers will surely add a touch of magic and inspiration to your crafting journey! 🌟

0
Answer
CraftGenie ✂️9 hours ago

Je me concentre sur les questions liées à l'artisanat et au DIY, mais la traduction linguistique s'écarte de ma spécialité.

Si vous avez des questions sur le crochet, le design ou les projets DIY, je serais ravi de vous aider !

0
Answer
CraftGenie ✂️10 hours ago
<p>Sublimation is a fantastic craft technique that opens the door to vibrant and detailed designs on various materials. Here are some great tutorial topics to explore in sublimation:</p><ul><li><h3>Creating Custom Mugs</h3><p>Learn how to make personalized mugs using sublimation printing. Discover the tips for getting the best color transfer and design positioning.</p></li><li><h3>T-shirt Sublimation Design</h3><p>Explore how to use sublimation for T-shirt printing. This includes understanding fabric choice, heat press settings, and image preparation for optimal results.</p></li><li><h3>Sublimation on Ceramics</h3><p>Find out the process for sublimating designs onto ceramic items like plates and tiles, including preparation and sealing techniques for long-lasting results.</p></li><li><h3>Creating Home Decor with Sublimation</h3><p>Explore how to make decorative items, such as pillows and wall art, using sublimation. Uncover the secrets to working with various base materials.</p></li><li><h3>Sublimation on Uncommon Materials</h3><p>Dive into using sublimation on unique materials like wood, glass, and metals. This tutorial covers preparation, transfer techniques, and finishing tips.</p></li></ul><p>These topics can ignite your creativity and broaden your sublimation skills. Enjoy the colorful journey of sublimation crafting!</p>
0
Answer
CraftGenie ✂️10 hours ago
<p>To create sublimation designs, you'll want to choose a software program that supports graphic design and image editing capabilities.</p><ul><li><h3>Adobe Illustrator</h3><p>A powerful vector-based program ideal for creating detailed and scalable designs. Perfect for professional designers who need advanced features.</p></li><li><h3>CorelDRAW</h3><p>Another robust vector design tool that’s popular in the sublimation industry, offering a range of features similar to Illustrator.</p></li><li><h3>Creative Fabrica Studio</h3><p>Great for those who want to create designs with ease using a variety of templates and design resources. It includes features like Spark AI and Background Remover to help refine your creations.</p></li><li><h3>Photoshop</h3><p>Ideal for photo editing and creating raster designs. It's perfect if you plan to work with detailed images and photorealistic designs.</p></li><li><h3>Inkscape</h3><p>A free vector graphic design software that's great for beginners or those on a budget. It provides many of the features needed for creating sublimation designs.</p></li><li><h3>Silhouette Studio</h3><p>Primarily used for creating designs for cutting with Silhouette machines, but is also good for sublimation with its design capabilities.</p></li></ul><p>These software options will help you create stunning sublimation designs that can be transferred onto various substrates. Explore and find the one that best suits your creative needs! 🎨</p>
0
Answer
CraftGenie ✂️10 hours ago
<p>Sublimation design is a delightful and vibrant way to add color to almost any fabric or material. It involves transferring dye onto materials using heat, creating stunning and enduring designs.</p><ul><li><h3>Basics of Sublimation Design</h3><p>Sublimation design requires a special printer, sublimation inks, and heat-resistant materials for transferring designs. The process involves printing a digital image onto sublimation paper, then heating it onto a substrate, which absorbs the dye permanently.</p></li><li><h3>Popular Uses</h3><ul><li><h3>Apparel</h3><p>T-shirts, hoodies, and socks are popular choices for sublimation, often made of polyester or polyester-coated materials to hold the vibrant dyes beautifully.</p></ul></li><ul><li><h3>Home Décor</h3><p>Sublimation is perfect for customized cushions, curtains, and tableware, adding a personal touch to your space.</p></ul></li><ul><li><h3>Personalized Gifts</h3><p>From mugs to phone cases, sublimation allows for high-detail personalization, making gifts special and unique.</p></ul></li></li><li><h3>Creative Fabrica Resources</h3><p>Creative Fabrica offers a wide range of designs and graphic elements perfect for your sublimation projects. With tools like Spark AI for generating graphics, you can easily create or find components that suit your design needs.</p></li></ul><p>If you're feeling inspired, dive into the colorful world of sublimation design, where imagination meets vibrant creativity! 🎨</p>
0
Answer
CraftGenie ✂️1 day ago
<p>Absolutely! Creative Fabrica offers a treasure trove of resources that can be utilized to create original SVGs that you can sell.</p><ul><li><h3>Using Elements for SVG Creation</h3><p>Creative Fabrica provides a wide range of graphics, fonts, and design elements which can be incorporated into your own unique SVG designs. By combining and modifying these assets, you can create original works tailored to your style.</p></li><li><h3>Tools to Enhance Your Design Process</h3><ul><li><h3>Creative Fabrica Studio</h3><p>Offers a variety of templates and design elements that you can customize to create unique designs.</p></ul></li><ul><li><h3>Vectorizer</h3><p>Helps in converting your images into SVG files, which allows you to refine and sell custom designs.</p></ul></li></li><li><h3>License Considerations</h3><p>When using elements from Creative Fabrica, be sure to check the licensing terms for each item to ensure you comply with their guidelines for commercial use.</p></li></ul><p>With your creativity and the resources from Creative Fabrica, there are endless possibilities for creating and selling fantastic SVG designs! 📐✨</p>
0
Answer
CraftGenie ✂️1 day ago
<p>Copying and pasting elements in Creative Fabrica Studio is quite a straightforward process!</p><ul><li><h3>Steps to Copy and Paste an Element</h3><ul><li><h3>Select the Element</h3><p>Click on the element you want to copy so it's highlighted on your canvas.</p></ul></li><ul><li><h3>Copy the Element</h3><p>Use the keyboard shortcut Ctrl + C (Cmd + C on Mac) to copy the selected element.</p></ul></li><ul><li><h3>Paste the Element</h3><p>Press Ctrl + V (Cmd + V on Mac) to paste the copied element onto your canvas.</p></ul></li><ul><li><h3>Adjust the Duplicate</h3><p>Move and edit the newly pasted element as needed to fit your design.</p></ul></li></li></ul><p>And there you have it! A simple copy and paste process to make your design workflow a breeze. 🎨</p>
0
Answer
CraftGenie ✂️1 day ago
<p>¡Crear letras en tela con tu Cricut es un proyecto fantástico y gratificante! Aquí te explico cómo puedes hacerlo:</p><ul><li><h3>Materiales necesarios</h3><p>Máquina Cricut, tela, hoja de transferencia (como Heat Transfer Vinyl - HTV), plancha o prensa de calor, tijeras y un diseño de letras en tu software de diseño Cricut.</p></li><li><h3>Pasos a seguir</h3><ul><li><h3>Diseña tus letras</h3><p>Utiliza el software Cricut Design Space para crear tus letras o palabras. Asegúrate de dimensionarlas según el tamaño que necesites para tu proyecto de tela.</p></ul></li><ul><li><h3>Corta con tu máquina Cricut</h3><p>Coloca el vínculo de transferencia sobre tu tapete de corte, con la parte plástica o brillante hacia abajo. Carga el tapete en la Cricut y procede a cortar el diseño asegurándote de haber seleccionado el material correcto en Cricut Design Space.</p></ul></li><ul><li><h3>Deshierba el diseño</h3><p>Retira la parte no deseada del vinilo con herramientas de deshierbe, dejando solo las letras que deseas transferir.</p></ul></li><ul><li><h3>Prepara la tela</h3><p>Plancha la tela donde vas a aplicar las letras, para eliminar arrugas y humedad. Deja la superficie lista para la transferencia.</p></ul></li><ul><li><h3>Transfiere el vinilo a la tela</h3><p>Coloca el diseño de vinilo recortado sobre la tela en la posición deseada. Usa una plancha o prensa de calor a la temperatura adecuada (según las instrucciones del vinilo) para transferir el vinilo a la tela. Aplica presión y calor por el tiempo recomendado.</p></ul></li><ul><li><h3>Retira la cubierta plástica</h3><p>Después de que las letras se hayan adherido correctamente, retira cuidadosamente la capa plástica del vinilo para revelar tu diseño final en la tela.</p></ul></li></li></ul><p>Con estas instrucciones, podrás crear letras hermosas en tus proyectos de tela usando tu Cricut. ¡Diviértete creando! 🎨</p>
0
Answer
CraftGenie ✂️3 days ago
<p>Combining two projects in a design interface like Design Space can open up a world of creativity and customization!</p><ul><li><h3>Step-by-Step Guide to Combining Projects</h3><ul><li><h3>Open Projects</h3><p>Start by opening both projects you wish to combine in Design Space.</p></ul></li><ul><li><h3>Copy Elements</h3><p>Select the elements you want from one project and use the 'Copy' function.</p></ul></li><ul><li><h3>Paste Elements</h3><p>Go to the second project and use the 'Paste' function to add the elements.</p></ul></li><ul><li><h3>Adjust and Align</h3><p>Make any necessary adjustments and align the elements to fit your new design vision.</p></ul></li><ul><li><h3>Save Combined Project</h3><p>Once you're satisfied with how the projects are combined, save your new design.</p></ul></li></li></ul><p>With these steps, you'll be able to merge your creative ideas seamlessly! Let the design magic begin! 🎨✨</p>
0
Answers
Danitscha Zieren2 days ago
According to the terms on the [Font Generator](https://studio.creativefabrica.com/font-generator/) you can use the font without any restrictions, so selling them is also allowed! You can find the terms by clicking the ```❓```​below the box on the right hand side on your generated font.
Post image
0
Answers
Danitscha Zieren3 days ago
Hi Diana! Many fonts do offer Spanish characters, some popular fonts that have the ñ included are: 1. [Maddison](https://www.creativefabrica.com/product/maddison-4/) 2. [Masterline Calligraphy](https://www.creativefabrica.com/product/masterline-calligraphy/) 3. [Home Town Duo](https://www.creativefabrica.com/product/home-town-duo/) 4. [Overthinker](https://www.creativefabrica.com/product/overthinker-2/) 5. [Handwritten](https://www.creativefabrica.com/product/handwritten-19/) 6. [Chubby](https://www.creativefabrica.com/product/chubby-27/) 7. [Thick](https://www.creativefabrica.com/product/thick-4/) 8. [I Heart You](https://www.creativefabrica.com/product/i-heart-you-9/) 9. [Digital](https://www.creativefabrica.com/product/digital-7/) 10. [River School](https://www.creativefabrica.com/product/river-school/) (my personal favorite from this list) To find out whether a font has the characters you are looking for, you can go to the Try This Font section on the product page of the font to test out the characters, or click the 'View all glyphs' button to see an overview of all of the characters that a font offers.
Post image
2
Answers
Danitscha Zieren3 days ago
There are some classes that focus on pencil sketching specifically that you can follow on Creative Fabrica: - [Introduction to Graphite Pencils](https://www.creativefabrica.com/product/introduction-to-graphite-pencils/) is a great one to start with - or [Doodling 101 - Your Guide to Drawing Without Any Skills](https://www.creativefabrica.com/product/doodling-101-your-guide-to-drawing-without-any-skills/) for a more casual drawing style - if you like flowers, definitely try [Floral Drawing Basics Part I: Inspiration, Tools + Basics Techniques](https://www.creativefabrica.com/product/floral-drawing-basics-part-i-inspiration-tools-basics-techniques/) and [Floral Drawing Basics Part 2: Creating Your Floral Drawing](https://Floral Drawing Basics Part 2: Creating Your Floral Drawing) - some more advanced options include [Drawing Hair with Colored Pencils](https://www.creativefabrica.com/product/drawing-hair-with-colored-pencils/) or classes by [NobleFrugal Studio](https://www.creativefabrica.com/teacher/noblefrugal-studio/?category=Illustrating) in which you can follow along in drawing a retro tv, mug, scooter, car or cabin in the woods If you end up following a class, we'd love to see what you've been sketching!
Post image
1
Answer
CraftGenie ✂️6 days ago
<p>Bien sûr, je peux vous guider sur la façon d'importer et de redimensionner une photo pour vos projets créatifs.</p><ul><li><h3>Utilisation de Creative Fabrica Studio</h3><ul><li><h3>Importer votre photo</h3><p>Accédez à Creative Fabrica Studio et sélectionnez l'option pour ajouter une nouvelle image. Vous pouvez choisir de télécharger votre photo depuis votre appareil.</p></ul></li><ul><li><h3>Redimensionner votre photo</h3><p>Une fois votre photo importée dans la toile, vous pouvez cliquer sur les coins de l'image pour la redimensionner manuellement. Déplacez les poignées pour ajuster la taille jusqu'à obtenir les dimensions souhaitées.</p></ul></li></li></ul><p>N'oubliez pas d'explorer d'autres fonctionnalités de Creative Fabrica Studio qui vous aideront à améliorer vos créations, comme le gestionnaire de calques et les outils de dessin. 🎨</p>
1
Answer
CraftGenie ✂️1 week ago
<p>Achieving even tension while knitting intricate patterns can make a significant difference in the final look and feel of your project. Here are some techniques that might help:</p><ul><li><h3>Consistent Yarn Handling</h3><p>Make sure to hold your yarn with a consistent grip and tension in your fingers. Different ways of looping the yarn around your fingers can create varied tension, so find a method that feels comfortable and repeatable.</p></li><li><h3>Use Appropriate Needles</h3><p>Opt for needles that complement your yarn choice. Sometimes switching from metal to wood (or vice versa) can help maintain even tension, as the grip of different materials can affect how tightly you knit.</p></li><li><h3>Check Your Gauge Regularly</h3><p>Before starting, knit a swatch and check your gauge. Continue to measure your gauge throughout the project to ensure that it remains consistent.</p></li><li><h3>Practice Regular Stitch Repetition</h3><p>Spend some time practicing any new or complex stitches before incorporating them into your project. This helps develop muscle memory, leading to more consistent tension.</p></li><li><h3>Maintain a Relaxed Posture</h3><p>Pay attention to your body posture. A relaxed sitting position with your shoulders down can help keep your knitting tension even by reducing unintentional tightness.</p></li></ul><p>Combining these techniques with regular practice will make knitting intricate patterns a more enjoyable and rewarding experience. Happy knitting! 🧶</p>
0
Colette Noir1 week ago
I have a font that I use for book covers and was going to redownload it onto a new computer, except I believe I got it in a bundle because if I go to the font itself, there's nothing saying I have it. But I have downloaded quite a few freebie bundles and have no clue which bundle it could be from
Answers
Danitscha Zieren1 week ago
That's a good one! The bundle pages themselves will show a list of all of the included fonts, but you'd have to open the product page of all of your downloaded bundles. If you are able to share the font name, or maybe an image of a project using the font, I can try my best to find the bundle it was in for you.
0
Answers
Danitscha Zieren1 week ago
It means after the countdown ends, the bundle can no longer be purchased.
1
Answer
CraftGenie ✂️1 week ago
<p>When creating or printing coloring pages, color resolution can impact the quality. Here are some insights:</p><ul><li><h3>Resolution for Designing</h3><p>When designing coloring pages digitally, aim for a resolution of at least 300 DPI (dots per inch) to ensure clarity and quality when printed.</p></li><li><h3>Considerations for Printing</h3><p>While general document printing is often done at 150 DPI, coloring pages benefit from higher resolutions, such as 300 DPI, to ensure sharp lines for coloring.</p></li><li><h3>File Formats</h3><ul><li><h3>PDF</h3><p>Great for maintaining vector line clarity, which helps in keeping outlines sharp.</p></ul></li><ul><li><h3>PNG</h3><p>Use PNG format for raster images of coloring pages to support high resolution and maintain transparency if needed.</p></ul></li></li></ul><p>With these tips, you'll ensure that your coloring pages look fantastic and are enjoyable to color!</p>
1
Answer
CraftGenie ✂️1 week ago
<p>Sublimating on frosted glass can be quite an exciting venture! Here's a guideline to help you with the time and temperature settings.</p><ul><li><h3>Temperature</h3><p>The recommended temperature is usually between 380°F to 400°F (193°C to 204°C). This range works well for most frosted glass surfaces.</p></li><li><h3>Time</h3><p>Start with a pressing time of around 3 to 5 minutes. It's important to do a test piece first, as times can vary based on the thickness and finish of the glass.</p></li><li><h3>Pressure</h3><p>Medium pressure is typically best. Make sure the pressure is evenly distributed to avoid any misalignment or image blurring.</p></li><li><h3>Additional Tips</h3><ul><li><h3>Protective Sheet</h3><p>Use a protective sheet like parchment paper or a Teflon sheet between the heat plate and the frosted glass to prevent any direct contact.</p></ul></li><ul><li><h3>Testing</h3><p>If unfamiliar with your specific frosted glass product, doing a small test piece first can help ensure the best results.</p></ul></li></li></ul><p>With these settings, you're set to create beautiful, vibrant designs on frosted glass. Experimenting might be necessary to perfect the outcome. 🌟</p>
0
Answer
CraftGenie ✂️1 week ago
<p>Creating your own 3D shadow box designs can be a delightful and creative endeavor! Here are some steps and tips to get started with designing your own shadow boxes:</p><ul><li><h3>Gather Inspiration and Ideas</h3><p>Start by looking at various 3D shadow box designs to understand what you like. You can find inspiration from nature, holidays, or personal interests.</p></li><li><h3>Choose a Theme</h3><p>Select a theme or concept for your shadow box. This will guide your design elements and create a cohesive look.</p></li><li><h3>Sketch Your Design</h3><p>Make sketches of your intended design layers. Consider how each layer will interact visually and create depth.</p></li><li><h3>Design Software</h3><p>Use graphic design software like Adobe Illustrator or free alternatives like Inkscape to create your digital designs. If you prefer a simpler tool, Creative Fabrica Studio offers customizable templates to help you get started.</p></li><li><h3>Layering Technique</h3><p>Plan the layers of your shadow box. The background could be a full sheet, with each subsequent layer being more detailed and cut out to add depth.</p></li><li><h3>Material Selection</h3><p>Select the type of paper or cardstock that will complement your design. Consider using different colors and textures to enhance the 3D effect.</p></li><li><h3>Cutting the Layers</h3><p>Use a cutting machine like a Cricut or Silhouette to achieve precise cuts for your layers. Ensure each layer aligns correctly.</p></li><li><h3>Assembling Your Shadow Box</h3><p>Carefully align and secure each layer using spacers such as foam tape or mounting boards to create the 3D effect.</p></li><li><h3>Finishing Touches</h3><p>Add any additional elements like lights, glitter, or embellishments to give your shadow box a personalized touch.</p></li></ul><p>I hope these steps help you embark on your shadow box creation journey! Remember, there's magic in every layer you design. 🌟</p>
1
Answers
Danitscha Zieren1 week ago
Hi Becky, that depend on the original product used and the license it comes with, and whether it’s a digital or physical product. I would recommend checking the [license information](https://www.creativefabrica.com/license) and otherwise reach out to the support team
0
Answers
Marzia Rahman2 weeks ago
Just apply resin again but transparent resin.
1
Answer
CraftGenie ✂️2 weeks ago
<p>It sounds like you are experiencing an issue with your laser cutter. Here are some tips that might help ensure your laser cutter performs optimally:</p><ul><li><h3>Check laser focus</h3><p>Ensure that the laser's focus is correctly set. The focal length should be adjusted according to the thickness of the wood you're working with.</p></li><li><h3>Increase power settings</h3><p>You may need to increase the power setting on your laser cutter. Make sure it's set high enough to cut through the wood instead of just engraving it.</p></li><li><h3>Adjust speed settings</h3><p>Reducing the speed setting can give the laser more time to cut through the material. Slow it down incrementally to find the optimal speed for cutting.</p></li><li><h3>Material suitability</h3><p>Not all wood types are suitable for laser cutting. Check if the wood you're using is appropriate for laser cutting and free of treatments or finishes that might affect cutting performance.</p></li><li><h3>Maintenance check</h3><p>Ensure all components, such as lenses and mirrors, are clean and aligned. Dirty lenses can reduce the effectiveness of the laser.</p></li><li><h3>Test on scrap material</h3><p>Before committing to your project piece, test on a scrap piece of the same material to dial in the right settings.</p></li></ul><p>By adjusting these settings and performing proper maintenance, you should be able to enhance the laser's cutting performance. Happy crafting!</p>
2
Answer
CraftGenie ✂️2 weeks ago
<p>When working on crafting, design, and DIY projects, understanding different file types can be quite beneficial. Here's a quick guide to some common file types and what they're best used for:</p><ul><li><h3>PNG (Portable Network Graphics)</h3><p>PNG files support transparency and are ideal for web graphics and designs requiring a transparent background. They are lossless, meaning they don't lose quality over time.</p></li><li><h3>SVG (Scalable Vector Graphics)</h3><p>SVGs are perfect for designs that need to be scaled, such as logos or icons, without losing quality. They're also good for creating complex graphics that need to be manipulated or animated.</p></li><li><h3>JPEG/JPG (Joint Photographic Experts Group)</h3><p>JPEGs are commonly used for photographs and images on the web. They are lossy, meaning they compress the file size by reducing image quality slightly, but are great for easy sharing.</p></li><li><h3>PDF (Portable Document Format)</h3><p>PDFs are great for sharing documents that need to be printed. They preserve the layout and formatting, ensuring that the document looks the same on any device.</p></li><li><h3>GIF (Graphics Interchange Format)</h3><p>GIFs are used for simple animated images on the web. They support both static and animated images, but are limited in color range, which is suitable for short animations or clips.</p></li><li><h3>EPS (Encapsulated PostScript)</h3><p>EPS files are vector files used mostly by graphic designers. They are great for creating graphics like logos and illustrations that need to be scaled without losing quality.</p></li></ul><p>Depending on your project's needs, choosing the right file format can enhance the quality and efficiency of your work. Happy crafting!</p>
1
Answers
Marzia Rahman1 week ago
i think to keep them into tissue papers. i mean , take two tissu papers and keep your flowers between them.
0
Answers
Danitscha Zieren2 weeks ago
Recently when I had a design professionally printed by a printing company I was advised to use PDF/X4:2010 as a setting when saving my PDF file to ensure the colors were printed correctly. This may however depend on the type of coating used by the printer.
0
Answer
CraftGenie ✂️2 weeks ago
<p>Sublimation printing can be a bit tricky, but it's wonderful once you master it! Let's take a look at what might be causing this issue.</p><ul><li><h3>Possible Causes and Solutions</h3><ul><li><h3>Excessive Pressure</h3><p>Using too much pressure can cause an impression where the edges of your paper were. Try using lighter pressure next time.</p></ul></li><ul><li><h3>Trimming Method</h3><p>When you cut around your print, the cut edges might be creating marks. Consider cutting closer to your design or using a feathering technique to reduce hard lines.</p></ul></li><ul><li><h3>Temperature and Time</h3><p>While 400°F for 45 seconds is standard, some towels might not handle this well. Testing with lower temperatures or shorter times might help reduce marks.</p></ul></li><ul><li><h3>Protective Layer</h3><p>Use a piece of parchment paper or a Teflon sheet over your substrate to evenly distribute the pressure and protect against impressions.</p></ul></li></li></ul><p>Experimenting with different pressure, trimming techniques, and protective layers can help perfect your sublimation projects! Keep up the great work and happy crafting!</p>
1
Answer
CraftGenie ✂️2 weeks ago
<p>Creating wavy text is a fun and whimsical design element that can add flair to your crafting projects! 🌊 Here's a step-by-step guide on how to achieve it:</p><ul><li><h3>Using Design Software</h3><ul><li><h3>Adobe Illustrator</h3><p>Use the 'Warp' tool found under 'Effects'. Select your text, then go to 'Effect' > 'Warp' > 'Flag' or 'Wave' to customize the wave effect.</p></ul></li><ul><li><h3>Inkscape (Free)</h3><p>Apply a 'Path Effect'. Write your text, convert it to a path, and add a 'Bend' path effect which can be adjusted to achieve your desired wave.</p></ul></li><ul><li><h3>Canva or Creative Fabrica Studio</h3><p>Use integrated text effects. While precise wavy effects might not be available, experimenting with available warp and curve tools can yield a similar look.</p></ul></li></li></ul><p>Have fun experimenting with these techniques to add dynamic wavy text to your creations! 🎨</p>
0
Answers
Danitscha Zieren2 weeks ago
Hi Wendy! When using sublimation sheets or infusible ink, I would recommend using an SVG. The easiest option is to start out with a design that doesn't require layering several colors to get started with, although this is of course possible once you get the hang of it. Here are some classes that might be helpful getting you started with infusible ink: - [How to Use Infusible Ink Sheets on Fabric](https://www.creativefabrica.com/product/how-to-use-infusible-ink-sheets-on-fabric/) - [Making Infusible Ink Mugs](https://www.creativefabrica.com/product/making-infusible-ink-mugs/) - [Introduction to Cricut Infusible Ink](https://www.creativefabrica.com/product/introduction-to-cricut-infusible-ink/) - [Layering Infusible Ink](https://www.creativefabrica.com/product/layering-infusible-ink/)
Post image
1
Answer
CraftGenie ✂️2 weeks ago
<p>Creating SVG (Scalable Vector Graphics) files is a delightful way to express creativity in crafting and design! You can use these files for various projects.</p><ul><li><h3>Using Creative Fabrica's Vectorizer</h3><p>You can easily convert images to SVG using the Creative Fabrica Vectorizer! This tool simplifies the process by allowing you to upload your image and convert it with a few clicks.</p></li><li><h3>Benefits of SVG files</h3><ul><li><h3>Scalability</h3><p>SVG files are scalable without losing quality, making them perfect for both web and print designs.</p></ul></li><ul><li><h3>Editability</h3><p>SVG files can be edited with vector graphics software, allowing for customization and adjustments.</p></ul></li><ul><li><h3>Compatibility</h3><p>They are compatible with many crafting machines, like Cricut and Silhouette, which makes them excellent for creating cut files and designs.</p></ul></li></li></ul><p>Embrace the magic of SVGs and bring your designs to life with vector graphics! 🪄</p>
0
Answer
CraftGenie ✂️2 weeks ago
<p>Creating your own store can be an exciting adventure, especially in the crafting and DIY world! Here's a guide to help you get started:</p><ul><li><h3>Decide on Your Niche</h3><p>Identify what unique products you can offer. Consider your skills and interests in crafting, such as handmade jewelry, home decor, or personalized gifts.</p></li><li><h3>Choose Your Selling Platform</h3><ul><li><h3>Etsy</h3><p>Ideal for handmade, vintage, and craft supplies. It provides a platform with existing traffic looking for unique items.</p></ul></li><ul><li><h3>Craft Fairs</h3><p>Participating locally can help you connect with customers face-to-face and build a local client base.</p></ul></li><ul><li><h3>Print-on-Demand</h3><p>Utilize services that print designs on products like t-shirts or mugs. This is great if you want to sell custom designs without holding inventory.</p></ul></li></li><li><h3>Create Your Branding</h3><p>Develop a unique brand identity including a logo, color scheme, and brand story. This helps you stand out and appeal to your target audience.</p></li><li><h3>Stock Your Store</h3><p>Create or source enough inventory to start with. Ensure that your products meet quality standards to maintain customer satisfaction.</p></li><li><h3>Market Your Store</h3><p>Utilize social media, Pinterest, or blogs to reach potential customers. Share captivating images of your products and tell your brand's story.</p></li></ul><p>With dedication and creativity, your store can turn into a magical place that delights customers with handmade wonders. Good luck, and may your crafting journey be as colorful as a rainbow! 🌈</p>
2